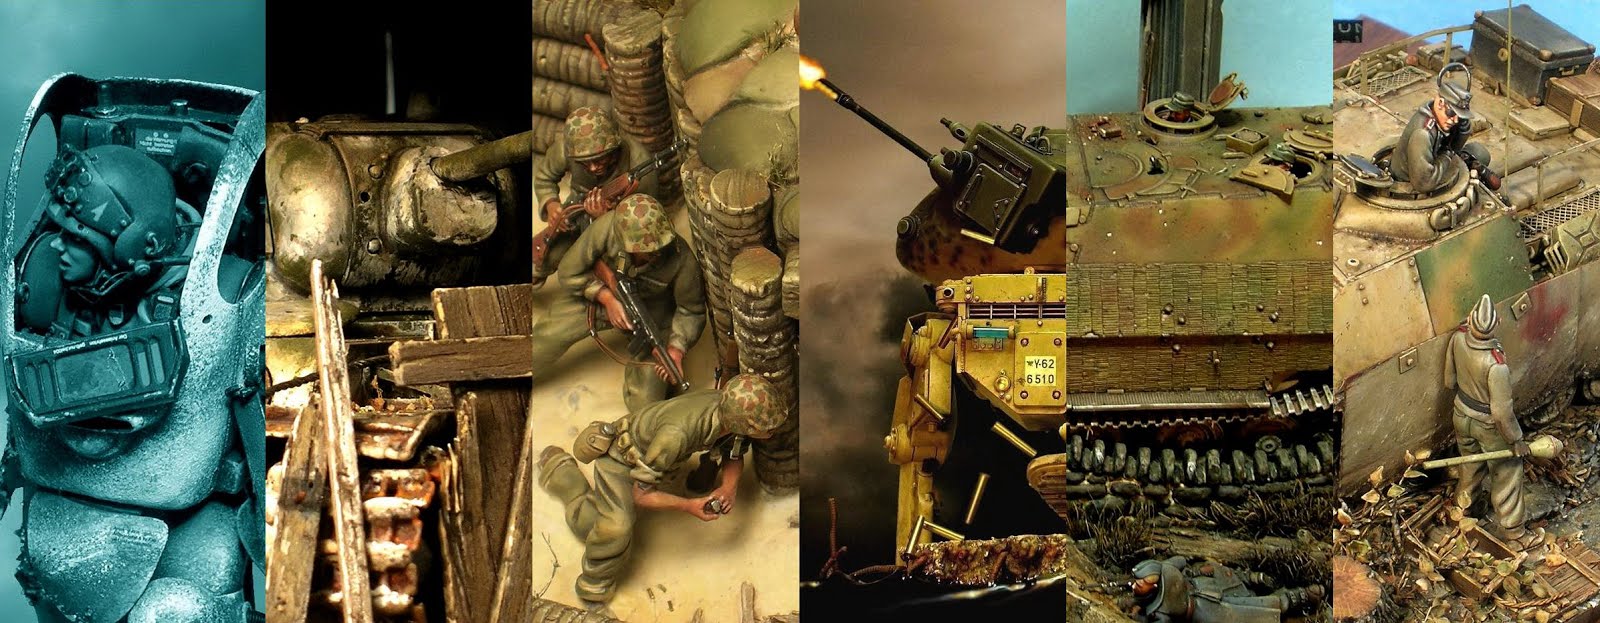
 A Soviet T34/85 tank smashes through the last line of defenses of the German 9. Fallschirmjäger-Division, 56. Panzer Korps, at Seelow Heights, April 1945.
Tamiya's 1/35th scale T34/85. No after market products used. Wire for grab handles. Half round plastic rod for the heavy weld bead around the turret. The turret and weld bead textured with a Dremil. Plastic rod and sheet lead to detail the external fuel tanks. A little work on the fuel tanks with knife and file to make the dents more realistic. Plastic rod for the hinges on the fender fronts.
A groundwork base I had made for ODG Studios to cast in resin and expanded foam. This is the first copy.
Collapsed Trench Bunker module
Scale - 1/35 (can also be used for 1/32 scale/54mmm subjects)
One piece 7in. (190mm) x 7in. (190mm) x 3 1/2 in. (90mm) casting of resin over a foam core.
Cast in details include;
Textured wooden logs (with and without bark)
Sandbags
Corrugated metal sheet
One (1) hand projecting from under the debris (wearing a wedding ring)
Can be used alone or a component in a larger diorama.
Can be used for WW I through today.
Designed to fit most vehicles.
Easily cut for modification.
This is the original master of the groundwork base being used to determine placement. A copy will be used in the finished diorama. The 10in. (255mm) diameter wooden base is from a craft store.
A possible candidate for a figure in the dio., from a "Battle of Seelow Heights" reenactment.
Video link-
Battle of the Seelow Heights 1945 t 34 tiger marder hetzer
"Old School". Brass rods to hold down the poly vinyl track. Elmer's Wood Filler stippled on lower hull as mud.
The rods have been flattened using a hammer and anvil. Elmer's will once again be used as mud to cover the rods.
Based in Model Master Acryl Panzer Schokladnbraun. Mixing
tan in with the green, then applying by brush. Varying the ratio with
more tan in some places resulting in a dirty finish. Not getting paint
in the panel lines to eliminate having to apply a dark wash. Applied a
black wash into the screen and grill areas. The paints are cheap acrylic craft paint applied by brush. I do not use an airbrush.
Mostly
finished the painting. The tactical number and stripe painted by hand.
A tarp and unditching log sculpted from Super Sculpey.
Determining the placement of the figure. A female head sculpted from Super Sculpey clay. The body parts are from Master Box.
Including a second figure with resin boots and helmet. Adding and refining detail to both. A Master Box Panzerfaust.
An
old set of Squadron's Armour Accessories. Made in France in the 1970's. Most of the detailing ahead of their time. Only a few pieces are not of today's
standard, like the undersized ammo can and the MP's unfolded stock. The ultra fine detail of the MG ammo belt is beautiful.
With the return of my painted copy of the base I can now add the figures and small detail pieces. The tank's hull is attached to the base with Elmer's Wood Glue. It is stronger than white glue and will not dissolve if I add water based washes. A metal block holds the hull in place as the glue dries. Balsa wood is used for addition lumber from the collapsed bunker.
Figures and a Master Box Panzerfaust attached. The figure's uniforms are painted Field Blue as they are members of the
the 9. Fallschirmjäger-Division.
9th Parachute Division (Germany) - Wikipedia, the free encyclopedia
Using the camera to check for flaws.
The above photo is of a only slightly modified groundwork base to show customers what can be done with the ODG Studios product. The photos below show it modified and extra detail added, to be displayed at the 2016 MFCA in Valley Forge Pa. in May.
Debris has been added, tumbling off of the sides of the diorama. The barbed wire is twisted wire that was barbed. The barbs are quiet sharp and pricked my finger giving me the idea to add blood puddles to the base. The base was stenciled with markings found on Panzerfaust crates. The base was damaged and given brown washes. Lastly it was coated with satin finish polyurethane.
Additional sandbags were sculpted from Super Sculpey. The corrugated sheet metal was cut from a soup can.
The casting of the groundwork is of expanded foam with a thin skin of resin. It is easily cut to remove part of it to depict an area that has collapsed. Balsa wood was used for the damaged, exposed continuation of the vertical log support in the rear corner. Hemp rope used for the grass in the tank track and weeds on the ground. The remains of the small tree were made from twigs coated and textured with Elmer's Wood filler to represent bark.
A damaged ''Spanish Rider'' was made from wooden dowels.
Cheese cloth was used for torn netting.
Squadron's Armour Accessories provide a bread bag, a Walther P-38, and also a gas mask container with a torn paper strap. The helmet with interior detail is a resin copy of a Tamiya helmet that I detailed.
The figure's painting was refined. Some of the shadows darkened, additional dirt and highlights added. For the fallen figure, wire was used for the shoelace bow. The woman has received a cut on her cheek. Is she reaching for the Panzerfaust, or the hand of a third, buried figure? She a Flakhelfer from Berlin has recieved permission (official or otherwise) to visit her fionce. They were married a few minutes ago...
3-03-16
On display at the Miniature Figure Collectors of America show in Valley Forge Pennsylvania 5-21-16
Photo by
Photo by
Photo by
Photo by Steven Zaloga.
Photo by James Rosado
Photo by Gregory Zuniga
...
...
 A Soviet T34/85 tank smashes through the last line of defenses of the German 9. Fallschirmjäger-Division, 56. Panzer Korps, at Seelow Heights, April 1945.


Outstanding work ! , Spectacular composition and layout. A masterful piece .
ReplyDeleteThank you very much Cary.
DeletePaul, you're a genius.
ReplyDeleteThank you very much Ralph.
DeleteWow!
ReplyDeleteThose details are simply amazing!
Greetz from "Thomas Kawasaki" FB
Thank you very much! I apologize for my late response. I am supposed to be notified of comments. That seems to no longer function. Sorry and thank you again!
DeleteThis comment has been removed by a blog administrator.
ReplyDeleteThis comment has been removed by a blog administrator.
ReplyDelete