I intend to make a micro gravity powered armor suit bay as part of a base inside the Martian moon Phobos. An object weighing 75 lbs. on Earth will weigh 1 (one) ounce on Phobos.
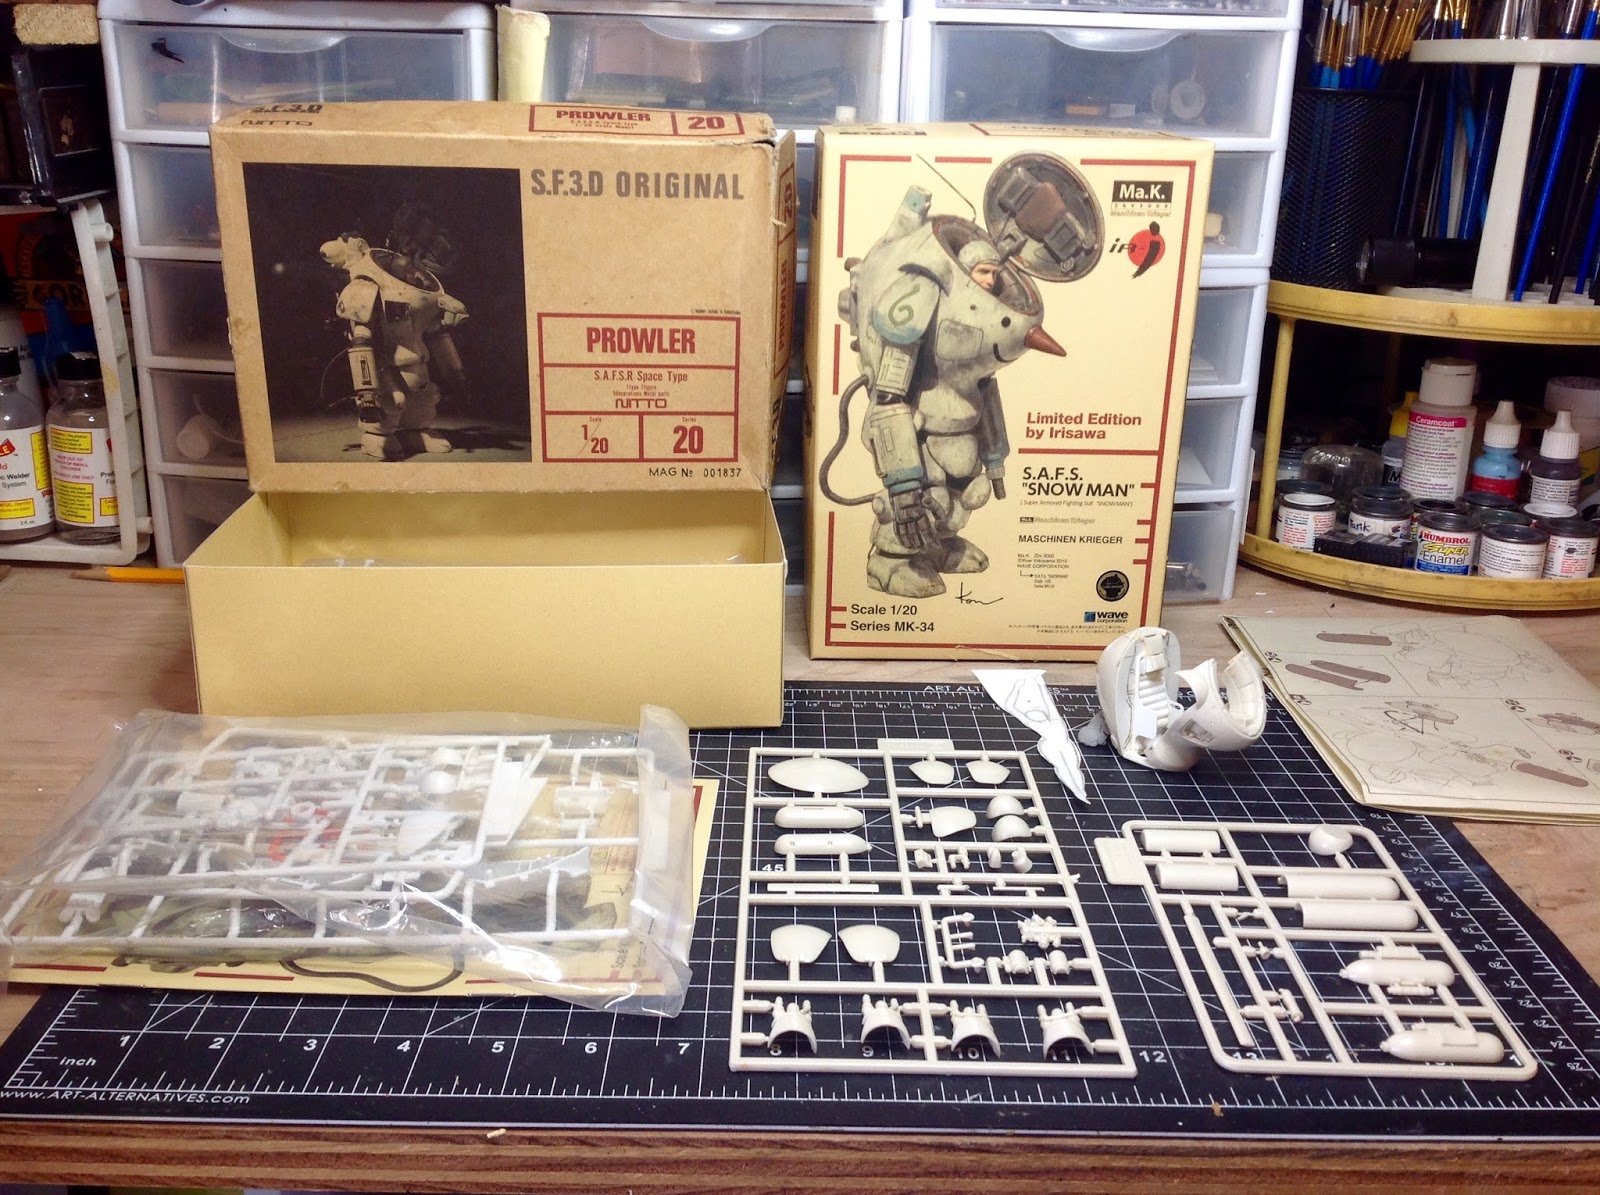
The old mid 1980s Nitto S.F.3D. Prowler. S.F.3D. is now Maschinen Krieger ZbV 3000.
Cutting it apart to make it a split suit.
Adding sheet plastic. The arms were latter discarded in favor of better ones from a Wave Corporation Snowman.
Filling the inside of the chest with Elmer's Wood Filler.
Wave's S.a.F.S. "Snow Man'' will provide better arms and legs than found in the Nitto kit.
Wave Snowman legs added.
Wave "Snow Man'' (white) and "Racoon" (dark gray) parts added. Cushions (pink) made from Super Sculpey sculpted onto the chest interior. A heat gun is very carefully used to bake the clay on the plastic.
The paper cut-out is of a nude female pilot 'swimming'' out of the suit in near zero gravity.
The laser, now a rail gun, elongated with Evergreen plastic tubing.
Interior detail pieces made from Evergreen sheet plastic and rod.
A
mock up. A minimalist yet l think elegant approach to displaying
the suit and figure in a zero or low G setting. A repurposed goose neck
desk lamp provides a weighted base, and a secure stanchion that
supports an overhead hatch and a locking clamp holding the suit in
place. Nothing supports the suit's feet giving the vignette more of an
in space feel. Need to scratch build an open hatch, a locking clamp and
assorted ancillary equipment.
3/16th in. foamboard used for the structure. Elmer's Wood glue used for strength and faster drying time.
The metal tubing of the lamps remains as the real support for the suit.
The foamboard is pinned as the glue sets.
A plastic shelving support will be used as the entry/exit tube into the bay.
The tubing as been cut to length/angle, glued in place and a rough coat of Elmer's Wood Filler applied.
The suit and locking clamp test fitted.
Elmer's Wood filler used to make a cast concrete texture. Styrene used to make additional elements. Brass rod for hand holds.
Concept sketch for the operator.
The operator's wire armature. She will be ''swimming'' in near zero G towards the open hatch.
Test fitting.
Laying on the clay. Super Sculpey with a few drops of acrylic gray paint for a better color that is opaque.
Refining.
Refining.
Refining.
Progress after 2 1/2 weeks.
Painting the structure.
Added detail to the structure.
A dress rehearsal with the figure.
Using Evergreen strips to make fast and east 40mm railgun ammo magazines.
Six magazines to be made.
... and containers to hold them. Roughly patterned on M548 ammo containers.
Though not finished, experimenting with placement.
Handles from aluminum wire and styrene strip.
Styrene strip for a reinforcing strip around the opening.
Making the inner surface of the open box lid.
Inner lid glued in place. Styrene rod piano hinges.
Hasp.
Ammo containers finished.
A rack to hold the ammo containers made from Evergreen channel.
Increasing the height of the structure by 1/2inch (12.5mm).
Detailing the figure's uniform and adding a helmet. A slight modification to the figure's pose. She now leans forward to grasp the hatch's handhold. This necessitated the increase in the structure's height.
Or.........
Construction complete (for now). Finishing the painting of the structure and equipment. Now painting the suit.
Finishing the suit's interior painting and starting to highlight/shadow and weather it's exterior.
Added and painting the figure and more painting of the structure. Also loaded magazines into the open ammo box.
Repainting some areas/details in darker colors so that they do not distract from the focus.
The figure was initially painted in craft paints but it's finish was too rough. Here is is being repainted with Reaper, MSP, and Vallejo paints.
Almost finished - refining details.
A mock-up for a monitor display.
...
The final version of the graphic. Designed using MS Paint on the computer. Printed on a black and white printer. Colored with acrylic paint.
Tactical monitor display installed.
Finished photos -
___
___
___
___
..........................


You are a master indeed, Paul!
ReplyDeleteYou make it all look so "simple".
Thank you very much, but it is not simple. I started work on it a year and a half ago.
DeleteOutstanding work, its un real...do you have any other locations where you post your work?
ReplyDeleteYou don't publish any other tips or guides or videos right?
I wanted to ask you a couple basic questions: you work with Super Sculpey original as is right? you don't bake it etc? Just add paint sometimes correct?
Thank you. I only post my work here and in the Ma. K. North America group on Facebook. I use Super Sculpey for sculpting. I bake Super Sculpey before painting. Here I used a heat gun and was not happy with the result.
Deletelike already mentioned on FB: absolutely stunning piece of art! Saludos! ThomasKawasaki
ReplyDeleteI thank you very much Thomas!
DeleteIt is really a piece that combines technical work, creativity , and artistic craft, in fact it can be seen as a scenographic environment for a sci-fi scene , or/and as a realistic model for the space technology field . We can watch and feel the soft and fluid movement of the astronaut girl, in near zero gravity, and this is the fascinating effect produced by this diorama . Every element is balanced , everything is prepared and set with attention , the passage from a structure which is solid and heavy, to a void environment where the body of the girl is so light : we are in the space , we know it for sure . As other people have said before me, it's a stunning piece .
ReplyDeleteI thank you for your kind words.
ReplyDelete